You notice it late in the evening while looking in the bathroom mirror. Your mascara is still there, the blush has mostly survived the day — but your eyebrows have faded.
A quick face rub somewhere between work emails and errands has left them patchy and uneven. Suddenly your face looks softer, almost unfinished.
Booking a salon appointment crosses your mind. Then you check your schedule and your budget.
That’s usually when many people start searching online for a simple solution: how to tint eyebrows at home.
An Easy Method for At-Home Eyebrow Tinting — For Soft, Defined, Natural Brows
Why Tinted Brows Are Becoming So Popular
Once someone experiences a good eyebrow tint, it can completely change their routine.
Instead of drawing eyebrows every morning with pencils or gels, the tint subtly colors the tiny, often invisible hairs in the brow area. This instantly makes brows look fuller without heavy makeup.
The effect is surprisingly natural.
Rather than noticing the brows themselves, people often just see a refreshed face.
Friends might say you look well-rested — even if all you changed was your brow tint.
That’s the quiet appeal of tinted brows:
low effort, natural results, and a more polished look throughout the day.
How Brow Tinting Works
Unlike eyebrow pencils or powders that sit on the skin, brow tint works by coloring the hairs themselves.
This creates a subtle frame around the eyes and enhances the brow shape you already have.
A good tint:
darkens lighter hairs
improves overall brow density
reduces the need for daily makeup
Because the color attaches to the hair rather than the skin, the result usually looks soft and natural even in daylight.
The Easy At-Home Method for Natural Brows
Doing your own brow tint at home is easier than many people expect.
The key is choosing a gentle tint kit designed specifically for eyebrows. Avoid products meant only for scalp hair.
Step 1: Choose the Right Shade
Selecting the right color prevents brows from looking too harsh.
General rule:
Dark hair: choose a tint 1–2 shades lighter
Blonde or gray hair: choose a shade slightly darker
This keeps the result soft and balanced.
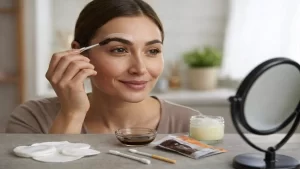
Step 2: Prepare Your Tools
Before starting, set up a small workspace.
You’ll need:
cotton pads
cotton swabs
a small angled brush
petroleum jelly or thick cream
a non-oily cleanser
Clean the eyebrow area thoroughly and dry it completely.
Apply a thin layer of cream around the brows to protect the surrounding skin from staining.
Step 3: Apply the Tint Carefully
Mix the tint and developer according to the instructions.
Start applying color at the tail of the brow, where slightly darker definition looks most natural.
Then move toward the middle of the brow.
Finish at the front using only a small amount of product for a softer, more natural gradient.
This technique prevents the brows from looking too heavy near the nose.
Step 4: Control the Timing
Timing matters more than people think.
If the instructions suggest leaving the tint on for 10 minutes, beginners should start with 5–6 minutes.
You can always go darker during the next session.
Over-tinted brows, however, take time to fade.
Step 5: Rinse and Check the Result
Gently remove the tint with a damp cotton pad.
Then check the brows in natural light.
If the color looks slightly lighter than expected, that’s usually perfect — it will deepen slightly over the next day.
Many people find that a small tint every two to four weeks keeps their brows looking naturally defined.
Common Mistakes to Avoid
A few small errors can lead to less natural results.
Going Too Dark
Starting with a shade that’s too dark can create harsh brows. Lighter tones are easier to adjust.
Ignoring Your Natural Shape
Follow the hair pattern you already have rather than trying to redesign your brows completely.
Applying Too Much Product at the Front
The inner brow should remain softer for the most natural look.
Why Many People Stick With Brow Tinting
After a few sessions, many people notice something surprising: their morning routine becomes faster.
Instead of filling in sparse areas daily, their brows already appear fuller.
That means:
fewer makeup steps
less midday touch-ups
more consistent results in photos and video calls
For many, a 15-minute tint every few weeks replaces several daily makeup steps.
Key Tips for Better Brow Tint Results
| Key Point | Detail | Benefit |
|---|---|---|
| Choose the right shade | Go 1–2 tones lighter for dark hair, slightly darker for fair hair | Keeps brows soft and natural |
| Apply strategically | Start at the tail and finish at the front | Creates realistic depth |
| Control processing time | Begin with shorter timing | Allows safe adjustments |
Frequently Asked Questions (FAQs)
How long does an at-home eyebrow tint last?
Most eyebrow tints last 2 to 4 weeks, depending on skin type, hair growth, and how often you wash your face.
Can I use regular hair dye on my eyebrows?
It’s not recommended. Hair dyes designed for scalp hair can be too strong for the delicate skin around the eyes. Always choose a product specifically made for eyebrow tinting.
What if my brows turn out too dark?
Don’t panic. The color usually softens within a few days. Washing the brows gently with a mild cleanser can help fade the tint slightly faster.
Is eyebrow tinting safe for sensitive skin?
Many at-home kits are formulated for sensitive areas, but doing a patch test 24 hours before applying the tint is strongly recommended.
How often can I tint my eyebrows?
Most people safely tint their brows every 3 to 4 weeks. Tinting too frequently may dry out the brow hairs, so giving them time between sessions helps maintain healthy brows.